
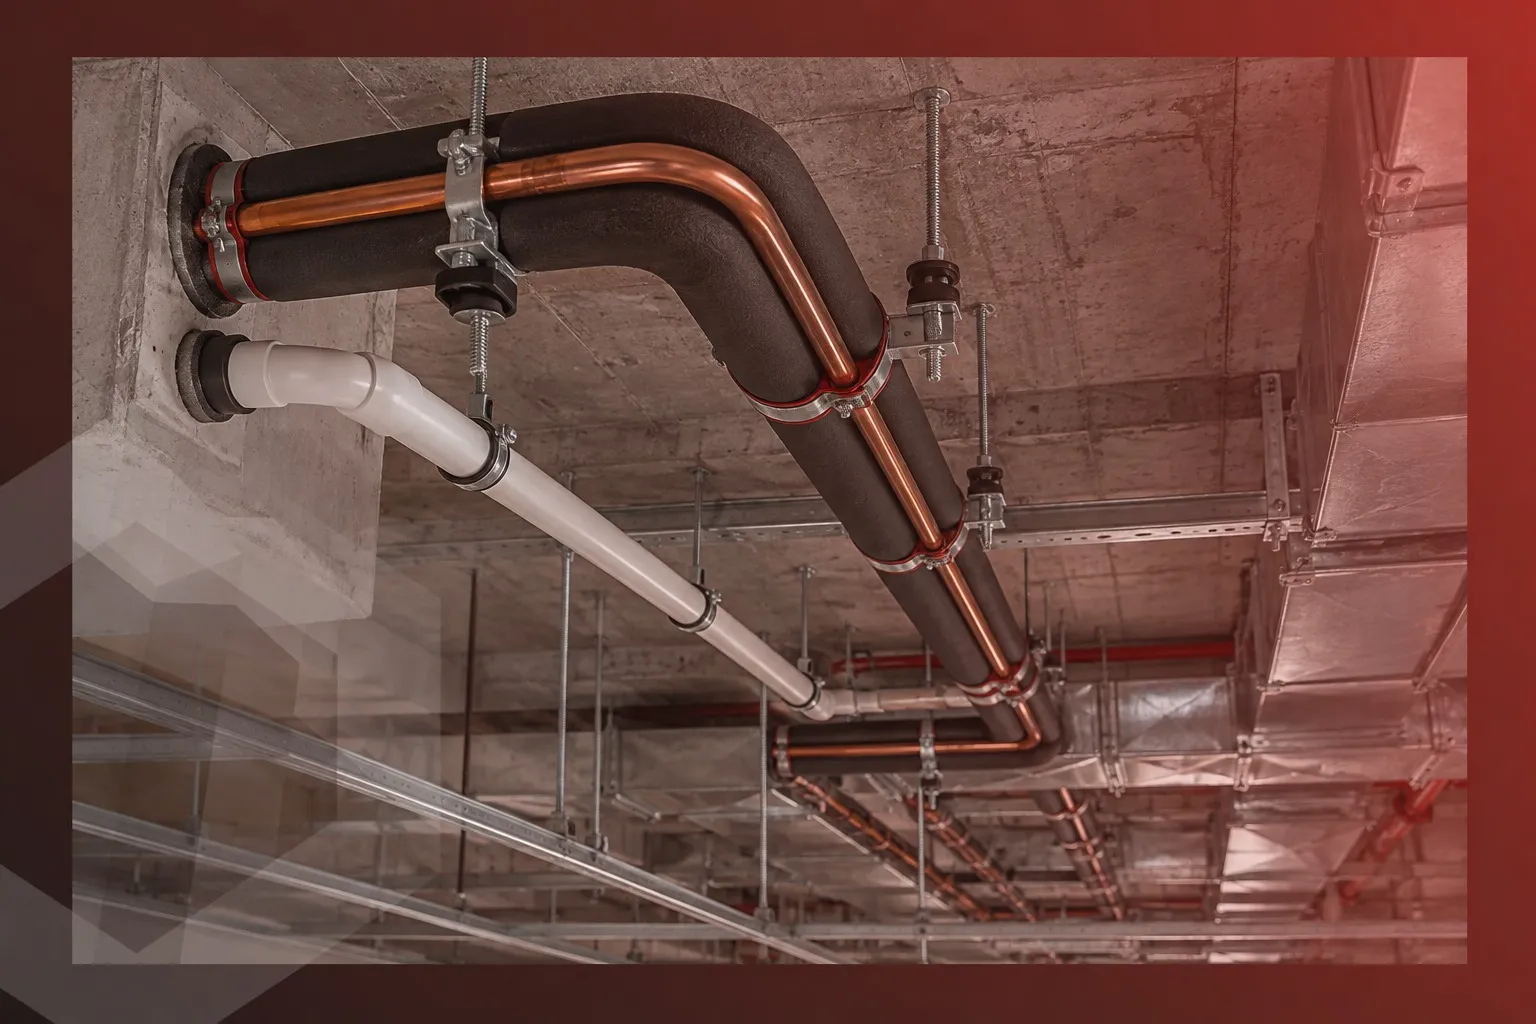
Installation of air conditioning piping
A comprehensive guide by I-CON on AC copper piping installation and split unit preparation. Learn best practices for air conditioner piping work, insulating split AC copper pipes, concealing AC pipes in walls, and proper AC drain pipe installation to prevent leaks, alongside key factors affecting overall AC installation cost.
An air conditioning unit may be highly efficient on its own, yet its most frustrating problems often start from somewhere invisible: the piping. Selecting an improper route, using poor insulation, or executing drainage incorrectly during AC copper piping installation can significantly reduce cooling efficiency and increase the likelihood of post-finishing breakdowns.
Therefore, system quality does not begin with the AC unit itself, but rather with meticulous planning and execution of the piping network based on technical specifications. Proper installation includes preparing routing paths, running copper pipes, applying thermal insulation, setting up condensate drainage, and pressure-testing the system before sealing the walls.
In this article, we cover the essential steps, common technical mistakes, and best practices for installing an efficient AC piping network.
What Does AC Copper Piping Installation Mean? Why Is It Important?
AC piping installation refers to preparing and routing copper refrigerant lines, condensate drain pipes, and electrical cables inside walls, ceilings, or floors prior to wall finishing to ensure peak cooling efficiency and prevent water or gas leaks.
This stage involves determining direct paths between indoor and outdoor units to keep pipe runs as short as possible, using certified copper pipe diameters, and applying proper thermal insulation to protect the property from condensation damage and refrigerant loss in the future.
Importance of Proper AC Piping Installation for Cooling Efficiency
Proper preparation of AC piping ensures efficient refrigerant flow and prevents gas leaks and water condensation, protecting your building’s interior finishes.
Key benefits of proper installation include:
- Maintaining Cooling Performance: Routing pipes according to manufacturer specifications supports optimal system output.
- Minimizing Refrigerant Leaks: Proper jointing techniques and pressure testing eliminate potential leak points.
- Reducing Energy Losses: Quality thermal insulation minimizes unwanted heat exchange along refrigerant lines.
- Preventing Condensation Issues: Proper insulation and dedicated drainage setup eliminate interior wall moisture and water damage.
- Simplifying Maintenance: Organized, well-planned piping routes make future inspections and troubleshooting straightforward.
- Protecting Interior Finishes: Identifying and fixing pipe issues before closing walls avoids costly wall chipping and repainting later.
Standard installation guidelines emphasize bundling refrigerant lines, drain hoses, and electrical wiring neatly, placing the drain hose at the bottom of the bundle to prevent condensation buildup, and pressure-testing the entire loop with nitrogen before sealing walls and ceilings.
When Should AC Piping Installation Take Place?
AC piping installation typically takes place during the rough-in (pre-finishing) phase, when pipes need to be routed inside brick walls, concrete ceilings, floor slabs, or dedicated utility shafts before plastering and painting.
Identifying pipe routes and mounting locations early allows seamless coordination with architectural design, electrical setups, and other MEP services, avoiding costly alterations after interior finishes are completed. Early planning precisely determines:
- Unit Placement: Defining exact positions for indoor and outdoor units to ensure uniform air distribution and easy access for maintenance.
- Supply and Drain Routes: Routing copper refrigerant lines, power and control cabling, and condensate drain lines.
- Penetrations and Wall Openings: Sizing core wall and slab sleeves according to system capacity requirements.
Approved engineering shop drawings specify wall openings and pipe paths based on the cooling tonnage, incorporating required slope angles for drain lines to prevent water backup or internal seepage.
How to Install AC Piping Correctly and Avoid Mistakes
Executing AC piping installation correctly relies on following engineering standards regarding pipe sizing, thermal insulation, and nitrogen pressure testing. This process includes:
Preparing AC Copper Piping
Preparation starts with determining the correct pipe types and diameters required for the specific system capacity, followed by laying out the clearest route between indoor and outdoor units.
Key precautions during preparation:
- Inspecting copper tubes to ensure they are free from kinks, dents, or defects.
- Capping pipe ends securely to prevent ingress of dust, moisture, and debris.
- Mapping out exact paths before starting copper extension.
- Avoiding tight bends and unnecessary direction changes.
- Adhering to maximum allowable piping lengths specified by the equipment manufacturer.
Extending AC Copper Lines
Copper lines are extended between indoor and outdoor units following approved layout plans, avoiding sharp bends and protecting lines from mechanical damage during construction.
Routes should remain accessible for future maintenance without conflicting with electrical conduits or other building utilities.
Concealing AC Pipes in Walls or Slabs
Concealing AC lines inside brick walls or floor slabs maintains interior aesthetics and eliminates exposed external trunking after wall finishing.
Before embedding pipes in walls, ensure:
- The routing path is clearly defined and marked.
- Sufficient chasing depth and width are provided to fit both pipes and insulation.
- Lines are shielded from impact or crush damage during masonry and plastering work.
- Accessible inspection access is provided for any mechanical fittings.
- The piping network undergoes pressure testing before final wall closing.
Insulating Split AC Copper Pipes
Insulating split AC copper lines is a critical step. Inadequate or low-grade insulation causes moisture to condense on pipe surfaces, staining walls and reducing cooling efficiency.
Thermal insulation must completely wrap both liquid and suction lines independently, paying close attention to joints and fittings in accordance with manufacturer instructions.
Setting Up AC Condensate Drainage
Indoor cooling coils produce condensation that must be safely drained away. Setting up dedicated AC condensate drainage is a foundational part of rough-in work.
Key drain setup considerations:
- Maintaining a continuous downward slope to allow gravity water flow.
- Avoiding high spots or traps where standing water can collect.
- Preventing drain hoses from dipping into positions that cause water backflow.
- Connecting to an appropriate final drainage discharge point (with a p-trap).
- Testing water flow in drain lines prior to closing wall chases.
Split AC Preparation: Essential Considerations
Preparing for a split AC unit requires coordinating indoor and outdoor unit locations from day one, as the distance and elevation difference between them dictate piping, electrical wiring, and drainage specs.
Prior to split AC installation, confirm:
- Indoor unit position for optimal airflow coverage.
- Outdoor unit position with adequate ventilation and maintenance access.
- Clear line of path for refrigerant piping.
- Dedicated power supply and communication cable routes.
- Condensate drain discharge route.
- Wall penetration points and sleeve sizes.
- Total pipe run lengths within manufacturer limits.
Common Mistakes in AC Piping Installation
Careless AC piping installation leads to poor cooling performance, water leaks, and early compressor failure. Following engineering codes avoids these operational errors.
|
Common Installation Mistake |
Technical and Operational Impact |
|
Neglecting thermal insulation or using inferior materials |
Loss of cooling capacity, surface condensation on walls, paint peeling, and mold growth. |
|
Connecting drain lines directly to sewer pipes without a trap |
Foul odors and insects escaping back into living spaces through the indoor unit. |
|
Bending copper pipes manually without bending tools |
Kinking the pipe, restricting refrigerant flow, and overworking the compressor. |
|
Ignoring required slope gradients along drain lines |
Water accumulation inside drain lines leading to overflow from the indoor unit. |
|
Using uncertified or thin-walled copper tubing |
High risk of pinhole leaks and refrigerant loss under high operating pressures. |
|
Sealing walls without nitrogen pressure testing |
Unnoticed leaks requiring wall chipping and costly repairs post-finishing. |
|
Leaving pipe ends uncapped during masonry work |
Dust and moisture entering copper lines, causing blockages and compressor damage. |
|
Poor placement of indoor and outdoor units |
Uneven air distribution, outdoor unit overheating, and difficult maintenance access. |
At I-CON MEP Solutions, we execute AC piping installations according to international engineering standards to ensure high cooling performance and protect your interior decor.
Material Requirements for AC Piping by I-CON
High-performance AC piping requires certified components and fittings that maintain smooth refrigerant flow, preventing gas leaks and compressor strain.
Core network components include:
- Refrigerant Copper Tubing: High-purity, seamless copper tubing with approved wall thickness designed to withstand high working pressures (R-410A / R-32).
- Fittings and Joints: Certified elbows and couplings used for direction changes, silver-brazed with an inert gas purge to avoid internal oxidation.
- Thermal Insulation: Closed-cell elastomeric foam insulation installed on lines individually to prevent surface condensation and conserve energy.
- Service Valves and Ports: Isolation and access valves enabling system evacuation, pressure testing, and future refrigerant servicing.
- UPVC Condensate Drain Lines: Rigid, thick-walled UPVC pipes dedicated to carrying condensate water safely to the building drainage system.
AC Piping Installation Steps by I-CON
Successful installation begins with engineering planning before on-site execution:
- Project Scope Review: Analyzing architectural plans and defining cooling requirements.
- Engineering Layout: Designing pipe runs, sizing copper lines, and planning drain gradients.
- Utility Coordination: Mapping out paths to avoid conflict with electrical, plumbing, and structural elements.
- Material Supply: Delivering certified copper, insulation, and fittings matching project specs.
- Site Execution: Chasing wall routes, running insulated copper lines, and setting up drain paths.
- Quality & Pressure Testing: Pressurizing the copper network with dry nitrogen to verify joint integrity.
- Commissioning & Handover: Final inspection and system handover after wall finishes are complete.
This structured approach adapts to the specific architectural requirements of residential, commercial, and industrial projects.
Pricing Factors for AC Piping Installation
In the Egyptian market, the average price per linear meter for certified AC copper piping installation (for 1.5HP to 5HP split units) ranges between 450 EGP and 700 EGP per linear meter, while outdoor unit wall brackets cost between 400 EGP and 600 EGP depending on unit size and specifications.
Pricing varies based on copper pipe diameter and wall thickness required for each cooling capacity. Key factors influencing total cost include:
- Type and capacity of the AC unit (HP / Tonnage).
- Required copper pipe diameter and total run length.
- Total number of AC points in the project.
- Routing complexity and height/elevation challenges.
- Extent of wall chasing, drilling, and masonry concealment work.
- Quality and thickness of thermal insulation.
- Drainage network specifications.
- Associated electrical wiring requirements.
- Pressure testing and nitrogen hold tests.
- Project scale and site conditions.
Contact the engineering team at I-CON MEP Solutions to send your project drawings or schedule a site visit for precise material takeoff and cost estimation.
Images of AC Piping Installation
Reviewing site photos of AC piping installation helps visualize line routing, insulation wrapping, and drain slopes inside wall chases before plastering hides the pipe work.
Why Choose I-CON for Your AC Piping Work?
I-CON MEP Solutions delivers integrated engineering solutions for AC copper piping installation, combining precise shop drawings, certified materials, and formal warranties.
As a specialized Electromechanical (MEP) contractor, I-CON offers distinct operational advantages over standard installation mechanics:
- Compliance with Global Standards: We use internationally certified copper tubing and cabling that resist corrosion, cracks, and gas leaks beneath plaster and paint.
- Engineering Consultation: Technical site surveys determine short pipe routes, optimal unit placement, and leak-proof drainage layouts.
- MEP Coordination: We coordinate AC paths with electrical, plumbing, and structural layouts to eliminate site clashes during construction.
- Rigorous Pressure Testing: Every copper network is subjected to nitrogen pressure hold tests before wall closing to ensure complete system integrity.
- Schedule Discipline: Trained engineering teams execute wall chasing, pipe laying, and sealing efficiently to keep your finishing schedule on track.
- Official Warranty: Complete warranty coverage on all rough-in works provides long-term peace of mind and protects your investment.
Proper AC copper piping installation is not merely a preliminary setup step—it is the foundation of your air conditioning system's long-term reliability and efficiency. Successful preparation begins with smart layout planning, continues with quality piping and insulation, and finishes with rigorous pressure testing before walls are closed.
Contact I-CON MEP Solutions today to let our engineering team manage your AC rough-in from initial inspection and design to supply, installation, and pressure testing.
Frequently asked questions
Answers about this article and related topics.
AC installation cost varies based on unit capacity, total copper pipe length, site accessibility, and required masonry work. Turnkey unit installation pricing differs from rough-in piping preparation done during construction; exact pricing requires defining the specific scope of work first.
Pressure testing involves charging the sealed copper network with dry nitrogen gas at specified pressures to detect micro-leaks across brazed joints. Test pressure values and holding times follow manufacturer recommendations and project specifications.
There is no single maximum length for all AC units. Maximum allowable pipe runs and elevation differences depend on the unit's capacity, compressor type, and manufacturer guidelines. Always consult the technical manual for the specific AC model before finalized routing.